gun trader’s guide

Gun Trader’s Guide: A Comprehensive Plan (as of 12/31/2025)
Navigating the world of firearm trading requires diligent adherence to federal and state regulations‚ encompassing licensing‚ record-keeping‚ and compliance protocols for success.

I. Understanding the Gun Trading Landscape
The gun trading landscape involves defining traders‚ navigating complex legal frameworks‚ and analyzing current market trends to identify lucrative opportunities within the firearms industry.
Defining a Gun Trader
A gun trader‚ within the context of legal firearm commerce‚ encompasses individuals and businesses actively engaged in the buying and selling of firearms. This definition extends beyond casual transfers and includes those operating with a Federal Firearms License (FFL). These licensed entities facilitate transactions between manufacturers‚ distributors‚ retailers‚ and individual consumers. Gun traders can range from large-scale retail stores to smaller‚ specialized dealers focusing on specific firearm types or services.
Crucially‚ a gun trader isn’t simply someone who occasionally sells a firearm; it’s a professional undertaking requiring adherence to stringent regulations. Engaging in the business of dealing in firearms without the proper licensing is a federal offense. The scope of “dealing” is broad‚ encompassing not only direct sales but also activities like repairing firearms for profit or offering firearm appraisals as a service. Understanding this definition is paramount for anyone considering entering the gun trading profession‚ ensuring full legal compliance from the outset.
Legal Framework Governing Gun Trading
The legal landscape surrounding gun trading is complex‚ primarily governed by federal laws like the Gun Control Act of 1968 and the National Firearms Act (NFA). The Bureau of Alcohol‚ Tobacco‚ Firearms and Explosives (ATF) is the primary federal agency responsible for regulating firearm commerce. Key regulations include mandatory background checks through the National Instant Criminal Background Check System (NICS)‚ detailed record-keeping requirements (specifically Form 4473)‚ and restrictions on certain types of firearms.
State laws add another layer of complexity‚ often exceeding federal requirements. These can include additional licensing‚ waiting periods‚ restrictions on magazine capacity‚ and prohibitions on specific firearm types. Compliance necessitates a thorough understanding of both federal and state regulations. Failure to adhere to these laws can result in severe penalties‚ including fines‚ license revocation‚ and even criminal prosecution. Staying updated on evolving legislation is crucial for all gun traders.
Market Overview: Current Trends and Opportunities
The firearms market exhibits dynamic trends influenced by socio-political events‚ economic conditions‚ and evolving consumer preferences. Currently‚ there’s sustained demand for self-defense firearms‚ particularly handguns‚ alongside increased interest in modern sporting rifles (MSRs). Online firearm sales and auctions are gaining prominence‚ offering broader reach but demanding strict compliance with shipping regulations.
Opportunities exist in specialized niches like NFA items (suppressors‚ short-barreled rifles) requiring Special Occupational Tax (SOT) licenses‚ and customized firearm builds. Demand for firearm accessories – optics‚ ammunition‚ and storage solutions – remains robust. Successful gun traders differentiate themselves through exceptional customer service‚ competitive pricing‚ and a deep understanding of the legal framework. Adapting to changing market dynamics and embracing technological advancements are vital for sustained growth and profitability within this competitive industry.

II. Federal Firearms License (FFL) Essentials
Obtaining an FFL is crucial; various types exist‚ each permitting specific firearm-related activities‚ demanding a meticulous application process and adherence to ATF guidelines.
Types of FFL Licenses
Federal Firearms Licenses (FFLs) aren’t one-size-fits-all; they’re categorized based on the specific activities a dealer intends to conduct. Type 01 is the most common‚ allowing dealers to make‚ import‚ and sell all firearms outlined by the National Firearms Act (NFA). A Type 02 license permits dealers to solely deal in destructive devices‚ like grenades and machine guns.
Type 03 allows for the manufacture of ammunition‚ while Type 06 covers the manufacture of firearms for export only. Collectors often pursue a Type 03/07 FFL‚ enabling them to acquire and possess NFA items for personal collection‚ subject to strict regulations. Importers require a Type 08 license‚ and manufacturers of certain long-gun components need a Type 09. Finally‚ Type 10 licenses are for manufacturers of armor and armor piercing ammunition. Understanding these distinctions is paramount when selecting the appropriate FFL for your business model.
FFL Application Process: A Step-by-Step Guide
The FFL application‚ Form 7‚ is submitted online through the ATF’s eForms system‚ requiring a valid email address and scanned documents. First‚ create an eForms account and complete the online application‚ providing detailed information about your business‚ including its structure‚ location‚ and intended activities. You’ll need to upload supporting documents like a business plan‚ zoning compliance verification from local authorities‚ and photographs of your premises.
A Responsible Person questionnaire (Form 5300.9) must be completed for each individual with direct access to firearms. The ATF will conduct a background check on all Responsible Persons. Expect a thorough review process‚ potentially including an in-person compliance inspection. Upon approval‚ you’ll receive your FFL‚ authorizing you to engage in regulated firearms activities.
FFL Fees and Renewal Procedures
Currently‚ the application fee for a new FFL is $200 for most license types‚ payable to the ATF. Some specialized licenses‚ like those dealing with destructive devices‚ carry higher fees. FFLs are valid for three years from the date of issuance‚ necessitating a timely renewal process to maintain uninterrupted operation. Renewal applications are also submitted via the ATF’s eForms system‚ mirroring the initial application process.
Approximately 90 days before expiration‚ the ATF sends a renewal notice. Complete Form 7 again‚ update any business information‚ and resubmit supporting documentation. The renewal fee is the same as the initial application fee. Failure to renew before expiration results in license lapse‚ requiring a new application and background checks.
Common FFL Violations and Penalties
FFL holders must meticulously avoid several common violations. These include inaccurate or incomplete 4473 forms‚ failing to conduct thorough background checks‚ straw purchasing facilitation‚ and maintaining inadequate inventory records. Willful violations can lead to severe penalties‚ ranging from monetary fines to license revocation and even criminal prosecution.
Fines can reach up to $10‚000 per violation‚ and license revocation effectively shuts down the business. Criminal charges may result in imprisonment. Negligent violations‚ while less severe‚ still carry penalties like warnings‚ remedial training requirements‚ and civil fines. The ATF conducts regular compliance inspections‚ so proactive adherence to regulations is crucial. Maintaining detailed records and staying updated on ATF rulings are essential preventative measures.

III. State-Level Regulations
State laws significantly impact gun trading‚ varying widely regarding licensing‚ background checks‚ and permissible firearm types‚ demanding diligent local compliance.
State Licensing Requirements (Variations)
State-level licensing for gun traders exhibits substantial variation across the United States‚ creating a complex regulatory landscape. Some states require a separate state license in addition to the federal FFL‚ while others have no additional requirements. These state licenses often involve background checks‚ fingerprinting‚ and potentially‚ completion of firearms training courses.
The fees associated with state licenses also differ considerably‚ ranging from nominal amounts to several hundred dollars. Furthermore‚ the renewal periods for these licenses vary‚ with some requiring annual renewal and others allowing for multi-year licenses. Certain states impose restrictions on who can obtain a license‚ potentially disqualifying individuals with felony convictions or specific mental health conditions. It’s crucial for aspiring gun traders to thoroughly research the specific requirements of the state in which they intend to operate‚ as non-compliance can result in significant penalties.
Background Check Procedures by State
Background check procedures for firearm sales are significantly impacted by state laws‚ creating a patchwork of regulations across the nation. While the federal government utilizes the National Instant Criminal Background Check System (NICS)‚ many states supplement this with their own systems and requirements. Some states mandate that all firearm sales‚ including private transfers‚ go through a licensed dealer to initiate a background check.
Others require background checks only for sales conducted by licensed dealers. Waiting periods after a background check is initiated also vary‚ with some states imposing mandatory delays. The specific disqualifying factors beyond federal law can differ‚ encompassing domestic violence restraining orders or specific misdemeanor convictions. Gun traders must be acutely aware of the nuances of background check laws in their operating state to ensure full compliance and avoid legal repercussions.
Restrictions on Firearm Sales by State
State-level restrictions on firearm sales present a complex landscape for gun traders‚ varying dramatically across the country. Certain states heavily regulate specific types of firearms‚ such as assault weapons or large-capacity magazines‚ prohibiting their sale altogether or imposing strict limitations. Others restrict sales to individuals with specific criminal histories beyond federal prohibitions‚ including certain misdemeanor convictions or mental health adjudications.
Magazine capacity limits are common in some states‚ while others regulate features like pistol braces. Red flag laws‚ allowing temporary firearm removal based on perceived risk‚ also impact sales. Gun traders must meticulously track these evolving state laws‚ as non-compliance can lead to severe penalties. Understanding these restrictions is crucial for lawful operation and avoiding potential legal challenges.

IV. Special Occupational Tax (SOT) and NFA Items
Dealing in National Firearms Act (NFA) items necessitates a Special Occupational Tax (SOT)‚ alongside strict adherence to ATF regulations and compliance procedures;
What is a Special Occupational Tax (SOT)?
A Special Occupational Tax (SOT) is a federal tax imposed by the Bureau of Alcohol‚ Tobacco‚ Firearms and Explosives (ATF) on individuals and businesses engaged in the import‚ manufacture‚ or dealing of NFA firearms; These items include machine guns‚ short-barreled rifles and shotguns‚ suppressors‚ destructive devices‚ and certain large capacity magazines.
Essentially‚ it’s an annual fee in addition to the standard Federal Firearms License (FFL). Obtaining a SOT allows a dealer to legally conduct business with NFA items‚ but it comes with significantly increased scrutiny and regulatory burdens. The tax amount varies depending on the type of activity – importing‚ manufacturing‚ or dealing – and is subject to change.
Businesses intending to engage in any of these NFA activities must apply for and receive SOT approval from the ATF before commencing operations. Failure to do so results in severe penalties‚ including criminal prosecution. The SOT process is lengthy and requires detailed information about the applicant’s business‚ security measures‚ and personnel.
Dealing with NFA Firearms: Regulations and Compliance
Handling National Firearms Act (NFA) items demands meticulous adherence to ATF regulations‚ far exceeding standard firearm sales. Every transfer requires ATF approval via Form 4‚ a process involving background checks for both buyer and seller‚ and registration of the firearm with the National Registry.
Detailed records must be maintained‚ documenting every NFA transaction‚ including serial numbers‚ buyer information‚ and dates. Strict security protocols are mandatory to prevent theft or loss‚ often involving reinforced storage and alarm systems.

Compliance extends to inventory management; regular inventories are crucial‚ and any loss or theft must be reported immediately to the ATF. Furthermore‚ SOT holders face unannounced ATF inspections to verify compliance. Violations can lead to hefty fines‚ license revocation‚ and even criminal charges. Thorough understanding and diligent implementation of these regulations are paramount for any gun trader dealing with NFA items.
SOT Application and Approval Process
Obtaining a Special Occupational Tax (SOT) license is a complex process requiring detailed application submission to the ATF. Form 5630.1‚ the application‚ demands comprehensive information about your business‚ including its structure‚ security plan‚ and intended NFA activities. Fingerprints‚ photographs‚ and a responsible person questionnaire are also mandatory components.
The ATF conducts a thorough background check on all responsible persons‚ scrutinizing criminal history and financial stability. A detailed business plan outlining NFA operations is essential‚ demonstrating a legitimate purpose for the license.
Expect a lengthy waiting period – often exceeding a year – as the ATF processes applications. Periodic updates and responses to ATF inquiries are crucial. Approval hinges on demonstrating full compliance with NFA regulations and a commitment to secure handling of these regulated items. Denials are possible‚ and appeals processes exist.

V. Inventory Management and Record Keeping
Meticulous tracking of all firearms‚ alongside accurate completion of ATF Form 4473 and secure storage of records‚ are vital for compliance.
Accurate Inventory Tracking Systems
Maintaining a precise and detailed inventory is paramount for any successful gun trader‚ and is a core component of regulatory compliance. Implementing a robust system allows for quick identification of firearms‚ streamlines sales processes‚ and facilitates accurate reporting to the ATF. Modern solutions range from simple spreadsheets to sophisticated point-of-sale (POS) systems specifically designed for firearms businesses.
These systems should track key information for each firearm‚ including manufacturer‚ model‚ serial number‚ caliber‚ and acquisition date. Regular physical inventories‚ reconciled with the digital records‚ are crucial to identify discrepancies and prevent loss or theft. Utilizing barcode or RFID technology can significantly improve efficiency and accuracy during inventory counts. Furthermore‚ a well-maintained inventory system is essential for responding to ATF audits and investigations‚ demonstrating a commitment to responsible gun trading practices.
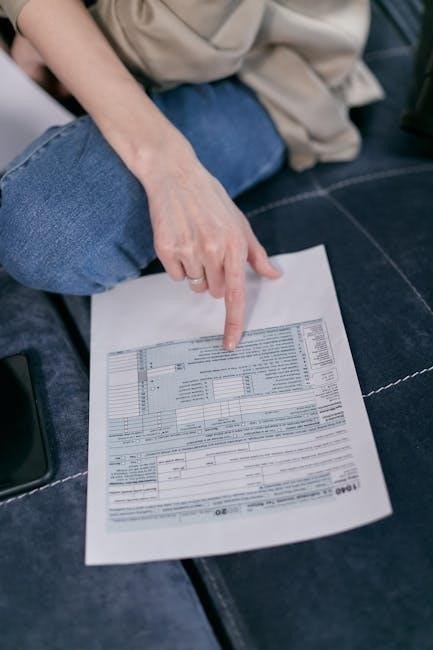
ATF Required Records: 4473 Forms and More
Federal law mandates meticulous record-keeping by all Federal Firearms Licensees (FFLs)‚ with the ATF Form 4473 serving as the cornerstone of firearm transaction documentation. This form captures crucial buyer information‚ including personal details‚ background check results‚ and the specifics of the firearm being purchased. Accurate and complete completion of the 4473 is non-negotiable‚ as errors can lead to severe penalties.
Beyond the 4473‚ FFLs must also maintain records of multiple sales of handguns‚ acquisition and disposition records‚ and any required National Firearms Act (NFA) documentation. These records must be retained for a specified period‚ typically several years‚ and be readily available for inspection by ATF investigators. Digital record-keeping systems‚ while permitted‚ must meet stringent security and backup requirements to ensure data integrity and accessibility.
Best Practices for Secure Record Storage
Maintaining the integrity and confidentiality of ATF-required records is paramount for any FFL. Secure storage isn’t merely a best practice; it’s a legal obligation. Physical records should be housed in a locked‚ fire-resistant safe or room with limited access‚ restricting entry to authorized personnel only. Implement a clear access log to track who views or handles sensitive documentation.
For digital records‚ employ robust encryption‚ multi-factor authentication‚ and regular data backups stored offsite. Ensure your IT infrastructure is protected by firewalls and anti-malware software. Regularly audit access controls and data security protocols. Consider utilizing cloud-based solutions specifically designed for FFL record management‚ offering enhanced security and compliance features. Remember‚ a data breach or loss of records can trigger significant fines and jeopardize your license.

VI. Compliance and Best Practices
Consistent adherence to ATF regulations‚ thorough background checks‚ and robust security measures are crucial for responsible and lawful gun trading operations.
Staying Updated on ATF Regulations
The Bureau of Alcohol‚ Tobacco‚ Firearms and Explosives (ATF) frequently updates its regulations concerning firearm sales‚ record-keeping‚ and overall compliance. Gun traders must proactively monitor these changes to avoid potential violations and penalties. Regularly checking the ATF website (atf.gov) for official announcements‚ rulings‚ and open comment periods is paramount.
Subscribing to ATF Industry Newsletters provides direct updates on regulatory modifications. Furthermore‚ attending industry seminars and workshops offered by organizations specializing in firearms law ensures a comprehensive understanding of evolving requirements. Ignoring these updates can lead to costly errors‚ license revocation‚ or even criminal charges. Maintaining a dedicated system for tracking regulatory changes—such as a digital alert service or a designated compliance officer—is a best practice for any successful and legally sound gun trading business.
Conducting Thorough Background Checks
Accurate and comprehensive background checks are the cornerstone of responsible gun trading and legal compliance. Utilizing the National Instant Criminal Background Check System (NICS) is mandatory for all FFL holders before transferring a firearm. However‚ simply submitting the 4473 form isn’t enough; traders must meticulously review all responses for inconsistencies or red flags.
Understanding disqualifying factors – such as felony convictions‚ domestic violence restraining orders‚ and mental health adjudications – is crucial. If any uncertainty arises‚ seeking clarification from the ATF or legal counsel is essential. Maintaining detailed records of each background check‚ including NICS transaction numbers and any follow-up actions‚ is vital for demonstrating due diligence. Thoroughness in this process protects both the business and the public‚ minimizing the risk of illegal firearm transfers.
Secure Firearm Storage and Security Measures
Robust security protocols are paramount for any gun trading business‚ safeguarding inventory and preventing theft or unauthorized access. FFL holders are legally obligated to maintain secure premises‚ employing measures like reinforced doors‚ alarm systems‚ and surveillance cameras. Firearms must be stored in a locked safe or vault when not being actively displayed or transferred.
Implementing a strict key control system‚ limiting access to authorized personnel only‚ is essential. Regular inventory audits help detect discrepancies promptly. Beyond physical security‚ cybersecurity is vital; protecting customer data and transaction records from breaches is crucial. Detailed security plans‚ regularly reviewed and updated‚ demonstrate a commitment to responsible gun trading and minimize potential liabilities. Compliance with ATF storage regulations is non-negotiable.

VII. Building a Successful Gun Trading Business
A well-defined business plan‚ strategic marketing‚ and strong supplier/customer relationships are vital for sustained growth and profitability in this competitive market.
Developing a Business Plan
A comprehensive business plan is the cornerstone of any successful gun trading venture. This document should meticulously outline your business structure – sole proprietorship‚ partnership‚ or corporation – and define your target market‚ identifying specific customer segments and their needs.

Detailed financial projections are crucial‚ encompassing startup costs (FFL fees‚ inventory‚ security systems)‚ operating expenses (rent‚ utilities‚ insurance)‚ and projected revenue streams. A thorough market analysis is essential‚ evaluating local competition‚ pricing strategies‚ and potential growth opportunities.
Your plan must also address inventory management‚ outlining sourcing strategies‚ storage protocols‚ and procedures for handling different firearm types. Furthermore‚ a robust compliance section detailing adherence to ATF regulations and state laws is paramount. Finally‚ define your marketing and sales strategies‚ including online presence‚ networking‚ and customer relationship management.
Marketing Strategies for Gun Traders
Effective marketing for gun traders requires a nuanced approach‚ balancing legal restrictions with the need to reach potential customers. A professional website is essential‚ showcasing inventory (within legal parameters)‚ services‚ and contact information. Social media marketing can be valuable‚ but demands careful adherence to platform policies regarding firearm-related content.
Networking within the shooting sports community – gun shows‚ shooting ranges‚ and local clubs – builds relationships and generates leads. Content marketing‚ such as informative blog posts or videos on firearm safety and regulations‚ establishes expertise and attracts organic traffic.
Consider targeted advertising‚ focusing on demographics interested in firearms‚ while respecting advertising platform restrictions. Building a strong reputation through excellent customer service and ethical business practices is paramount for long-term success. Email marketing‚ with opt-in consent‚ can nurture leads and promote special offers.
Building Relationships with Suppliers and Customers
Cultivating strong relationships with firearm suppliers is crucial for consistent inventory and competitive pricing. Regular communication‚ prompt payment‚ and clear order specifications foster trust and reliability. Attending industry trade shows provides opportunities to network and discover new products and suppliers. Diversifying your supplier base mitigates risk and ensures supply chain resilience.
Exceptional customer service is paramount. Building rapport‚ offering expert advice‚ and addressing concerns promptly builds loyalty. Implement a customer relationship management (CRM) system to track interactions and preferences.
Encourage repeat business through loyalty programs or exclusive offers. Seek customer feedback to improve services and inventory. A positive reputation‚ built on trust and integrity‚ is the cornerstone of a successful gun trading business.