winchester ranger model 120 12 gauge manual

Winchester Ranger Model 120 12 Gauge: A Comprehensive Guide
This guide details the Winchester Ranger Model 120, referencing online resources like Moodle for learning platforms and BOXnet for document centralization, aiding understanding.
The Winchester Ranger Model 120 represents a significant piece of American shotgun history, favored for its reliability and versatility. Much like the adaptable Moodle learning platform, offering flexible educational solutions, the Ranger 120 provided a dependable firearm for various applications. This guide aims to comprehensively explore this shotgun, drawing parallels to centralized information systems like BOXnet, which streamline access to crucial documentation.
We will delve into its mechanics, maintenance, and potential modifications. Understanding its operation is akin to navigating a robust online learning environment – requiring familiarity with its components. This exploration will benefit both seasoned shooters and those new to the Model 120, mirroring the support offered by online communities and gunsmithing services.
Historical Context and Production Years
The Winchester Ranger Model 120 emerged in 1970 as a more affordable alternative to Winchester’s higher-end models, mirroring the accessibility of platforms like Moodle for widespread education. Production continued until 1981, establishing a relatively short but impactful run in the American firearms market. Its design incorporated elements from earlier Winchester shotguns, aiming for a balance of cost-effectiveness and functionality.
Like the evolving nature of online resources such as BOXnet, the Ranger 120 filled a specific niche. It was intended for hunting and recreational shooting, offering a reliable and durable option for a broad range of users. Understanding its production timeline is crucial for identifying variations and assessing its historical significance within the Winchester lineage.
Key Features and Specifications
The Winchester Ranger Model 120 is a pump-action shotgun chambered in 12 gauge, much like adaptable learning platforms like Moodle. It features a tubular magazine under the barrel, typically holding 4-6 shells. Barrel lengths varied, commonly ranging from 26 to 30 inches. The receiver is constructed of aluminum alloy, contributing to its relatively lightweight design – around 6.5 to 7.5 pounds.
Similar to the centralized documentation of BOXnet, key features include a checkered walnut stock and forend. It boasts a simple, yet effective, sighting system. The Ranger 120’s design prioritized ease of use and reliability, making it a popular choice for hunters and sport shooters alike.

Understanding the Mechanics
Like Moodle’s platform structure, the Model 120 utilizes a pump-action, cycling shells via manual operation for reliable function and control.
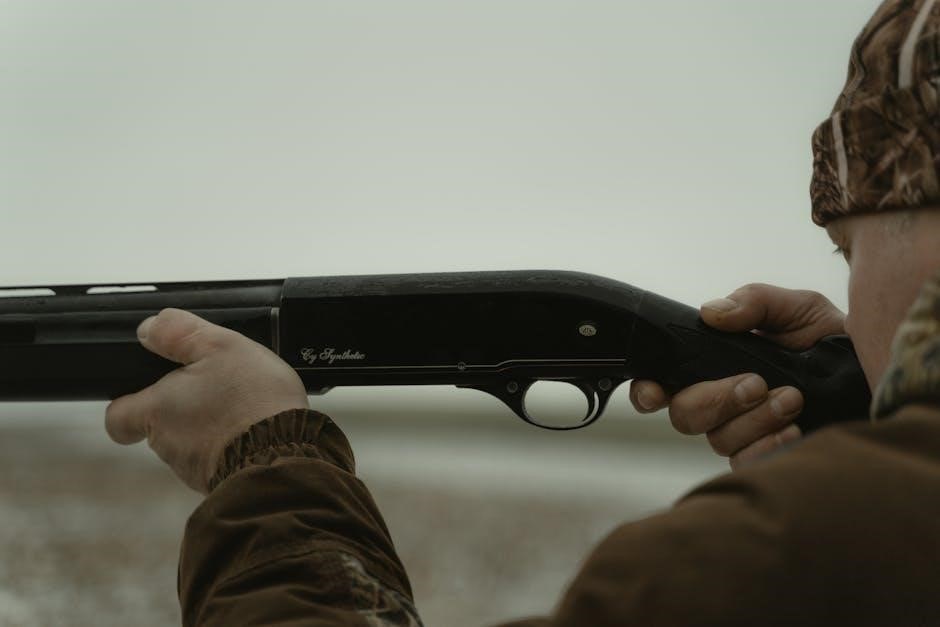
Action Type and Operation
The Winchester Ranger Model 120 employs a robust pump-action mechanism, mirroring the interactive learning environments found in platforms like Moodle. This means manual cycling of the action is required after each shot to eject the spent shell and chamber a fresh one.
The user slides the forend rearward, unlocking the bolt and initiating the cycle. Similar to accessing resources within BOXnet, this action requires deliberate engagement. Returning the forend forward chambers a new round, readying the firearm. This system provides a direct, tactile connection between the shooter and the firearm’s operation, offering reliable performance when properly maintained.
The pump action allows for relatively quick follow-up shots, dependent on the shooter’s skill and practice.
Chambering and Ammunition Compatibility (12 Gauge)
The Winchester Ranger Model 120 is specifically chambered for 12-gauge shotgun shells, a widely available and versatile ammunition type. It reliably handles a broad spectrum of 12-gauge loads, from light target loads to heavier field loads, much like Moodle’s adaptability to diverse learning styles.
However, it’s crucial to adhere to the shell length specifications outlined in the owner’s manual. Typically, the Model 120 accommodates shells up to 3 inches in length. Utilizing improper ammunition can lead to malfunctions or damage, similar to accessing incompatible files within a centralized system like BOXnet.
Always verify the shell’s markings and ensure compatibility before loading.
Trigger Mechanism Details
The Winchester Ranger Model 120 employs a traditional single-stage trigger mechanism, known for its simplicity and reliability. The manual details its operation, emphasizing a consistent pull weight for improved accuracy, akin to the consistent access provided by platforms like Moodle.
The trigger pull weight typically ranges between 6 to 8 pounds, though slight variations can occur. Disassembly for cleaning and inspection should only be performed by qualified individuals, mirroring the secure document handling within systems like BOXnet.
Proper lubrication, as outlined in the manual, is vital for smooth function.
Safety Features Explained
The Winchester Ranger Model 120 features a manual safety located on the trigger guard. Engaging the safety completely blocks the trigger, preventing accidental discharge, much like secure login protocols on platforms such as Moodle. The manual stresses always engaging the safety when handling the firearm.
Additionally, a loading/unloading indicator visually confirms the chamber status. Proper understanding of this indicator, detailed in the manual, is crucial for safe operation, similar to clear documentation within BOXnet.
Always point the muzzle in a safe direction and keep fingers off the trigger.

Disassembly and Reassembly
Detailed instructions, akin to Moodle’s step-by-step guides or BOXnet’s centralized documentation, are vital for safe and correct disassembly and reassembly procedures.
Field Stripping Procedure
Begin by ensuring the Winchester Ranger Model 120 is unloaded, adhering to strict safety protocols. Similar to accessing resources on platforms like Moodle or BOXnet, a methodical approach is crucial. First, engage the safety. Then, push the forend forward, releasing it from the barrel assembly.
Next, rotate the barrel locking lug and carefully remove the barrel. The bolt can then be withdrawn rearward and removed from the receiver. Disassembly beyond this point requires specialized tools and knowledge, mirroring the expertise needed for advanced Moodle configurations or BOXnet administration.
Remember to retain all parts for reassembly, referencing a detailed schematic if available.
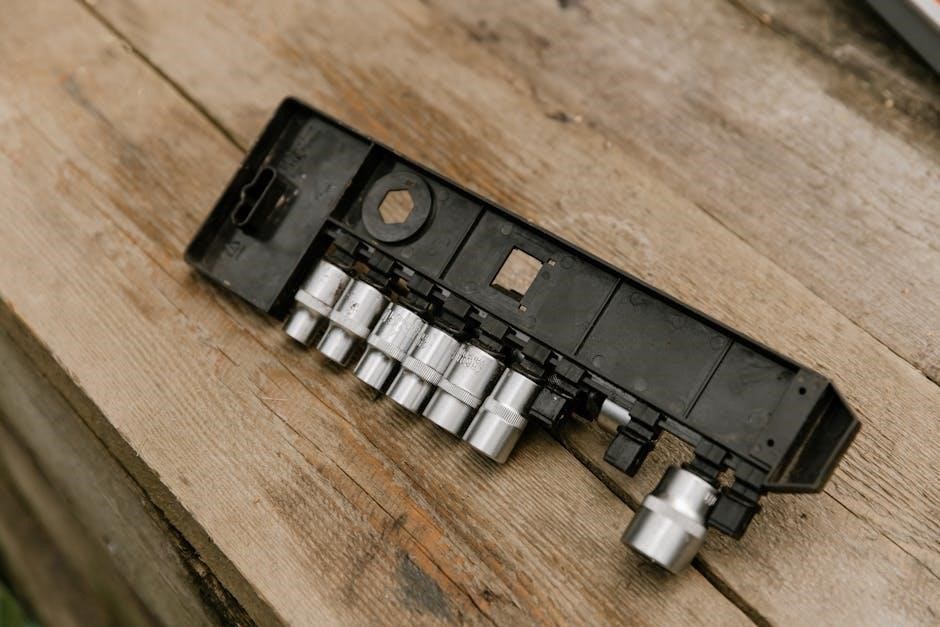
Detailed Parts Breakdown
The Winchester Ranger Model 120 consists of several key components. These include the receiver, barrel, forend, stock, bolt, trigger mechanism, and safety. Understanding each part, much like navigating a complex platform like Moodle or BOXnet, is essential for proper maintenance.
The receiver houses the action and provides the mounting point for the barrel. The bolt locks into the barrel extension, sealing the chamber during firing. The trigger mechanism controls the release of the firing pin.
Detailed schematics, often found in manuals or online forums, illustrate the precise relationship between these parts, aiding in disassembly and reassembly.
Reassembly Steps – A Step-by-Step Guide
Begin by carefully inserting the bolt into the receiver, ensuring proper alignment. Next, reinstall the trigger mechanism, verifying its smooth operation. Attach the stock to the receiver, tightening screws securely – similar to centralizing documents within BOXnet.
Slide the forend onto the barrel, ensuring it locks into place. Finally, double-check all screws and components, mirroring the thoroughness needed when setting up a Moodle course.
Always consult a detailed schematic during reassembly. A functional safety check is crucial before loading any ammunition.
Common Disassembly Issues and Solutions
A frequent issue is a stubborn trigger assembly, often resolved with gentle persuasion and proper tool usage – akin to troubleshooting access issues on Moodle platforms. Stripped screw heads can occur; utilize screw extractors carefully.
If the bolt won’t seat correctly, inspect for debris or damage, mirroring the need for clean data in BOXnet. A stuck forend may require a slight tap with a rubber mallet.
Always refer to a schematic and avoid excessive force. Patience and methodical approach are key, much like building a comprehensive online learning module.

Maintenance and Cleaning
Regular cleaning, like maintaining Moodle’s platform, ensures reliability. Proper lubrication, mirroring BOXnet’s data flow, prevents corrosion and sustains optimal function.
Recommended Cleaning Supplies
Maintaining the Winchester Ranger Model 120 requires specific supplies for optimal performance, much like a learning platform needs consistent updates. A quality gun cleaning solvent is essential for removing powder residue and fouling from the barrel and action. Utilize a bore brush, sized appropriately for 12 gauge, to scrub the barrel interior thoroughly.
Patches made of cotton or flannel, combined with the solvent, effectively wipe away loosened debris. A dedicated gun oil, such as a light machine oil, provides lubrication to moving parts, preventing rust and ensuring smooth operation – similar to BOXnet’s centralized data access. Don’t forget a soft cloth for wiping down external surfaces; A plastic or nylon brush helps clean hard-to-reach areas. Finally, safety glasses and gloves are crucial for protecting your eyes and skin during the cleaning process.
Cleaning Procedure for Barrel and Action
Begin by ensuring the Winchester Ranger Model 120 is unloaded, mirroring safe practices in online learning environments like Moodle. Attach a bore brush to a cleaning rod, applying solvent liberally. Push the brush through the barrel from breech to muzzle, repeating several times. Follow with solvent-soaked patches until they emerge clean, akin to updating a centralized system like BOXnet.
Next, disassemble the action (refer to disassembly instructions). Use a nylon brush to remove fouling from internal components. Apply gun oil sparingly to all moving parts. Wipe down the exterior with a soft cloth. Reassemble the shotgun carefully. Regular cleaning, like consistent platform maintenance, ensures reliable function and longevity.
Lubrication Guidelines
Proper lubrication is crucial for the Winchester Ranger Model 120’s smooth operation, much like a well-maintained online learning platform such as Moodle. Apply a high-quality gun oil sparingly to all moving parts after cleaning. Focus on the action bars, bolt, trigger mechanism, and pivot points. Avoid over-lubrication, as excess oil attracts dirt and debris, hindering function – similar to clutter in a centralized document system like BOXnet.
A light coat is sufficient. Wipe away any excess oil with a clean cloth. Regular lubrication, especially after exposure to harsh conditions, prevents corrosion and ensures reliable performance. Consistent upkeep, mirroring platform updates, extends the shotgun’s lifespan.
Long-Term Storage Best Practices
For extended storage of your Winchester Ranger Model 120, mirroring the preservation of digital resources on platforms like Moodle, thorough cleaning and lubrication are paramount. Apply a protective coating of gun oil to all metal surfaces to prevent rust, akin to securing data within a centralized system like BOXnet.
Store the shotgun in a cool, dry environment, away from direct sunlight and humidity. Utilize a gun sock or case for added protection. Ensure the firearm is unloaded and the safety is engaged. Regular inspection, like monitoring platform performance, is recommended to identify any potential issues before they escalate.

Troubleshooting Common Issues
Addressing malfunctions, similar to resolving issues on learning platforms like Moodle, requires systematic diagnosis and often, referencing the owner’s manual.
Feeding Problems and Solutions
Consistent feeding issues with the Winchester Ranger Model 120 often stem from ammunition incompatibility or a dirty action, mirroring troubleshooting steps for online platforms. First, ensure you’re using appropriate 12-gauge shells – consult the manual for specifications. Inspect the magazine tube and follower for debris or damage; a clean, functional magazine is crucial.
Next, thoroughly clean the action, bolt face, and chamber, removing any accumulated grime. Like maintaining a smooth user experience on Moodle, cleanliness is paramount. Check the cartridge stops for proper function. If problems persist, examine the shell ejector and ensure it isn’t impeding shell movement. A qualified gunsmith should address complex feeding malfunctions;
Ejection Issues and Remedies
Weak or inconsistent ejection with the Winchester Ranger Model 120 typically indicates a problem with the ejector or the extractor, similar to troubleshooting access issues on learning platforms. Begin by inspecting the ejector spring for fatigue or damage; a weak spring results in limp ejection. Ensure the ejector isn’t obstructed by debris or corrosion.
Next, examine the extractor claw for sharpness and proper engagement with the cartridge rim. A dull or damaged claw will fail to reliably extract and eject spent shells. Like ensuring data integrity in BOXnet, proper function is vital. If the ejector or extractor are damaged, replacement is necessary. Consult a gunsmith for professional repair or part replacement.
Trigger Function Malfunctions
Trigger issues in the Winchester Ranger Model 120, like login problems on Moodle, often stem from accumulated dirt, debris, or dried lubricant within the action. A gritty or heavy trigger pull suggests a need for thorough cleaning and lubrication of the trigger mechanism. Carefully disassemble the trigger group, following the manual’s instructions, and remove all fouling;
Inspect the sear and hammer for wear or damage. A worn sear can cause a creeping trigger pull or even a failure to engage. If parts are damaged, replacement by a qualified gunsmith is crucial. Ensure proper reassembly, mirroring the precision needed for a stable online learning environment like BOXnet.
Safety Mechanism Failures – Diagnosis and Repair
A malfunctioning safety on the Winchester Ranger Model 120 demands immediate attention, akin to securing access in a Moodle learning platform. First, verify the safety lever moves freely and positively engages/disengages. If sticky, carefully clean and lubricate the safety mechanism, avoiding excessive oil.
Inspect the internal components for wear or damage. A broken spring or bent lever can prevent proper function. Do not attempt to modify the safety; replacement by a qualified gunsmith is essential. Like BOXnet’s centralized documentation, a functioning safety is paramount for safe operation. Prioritize professional repair over DIY fixes.

Ammunition and Load Data
Utilize standard 12-gauge shells, mirroring the accessibility of Moodle’s online resources. Refer to the manual for specific load recommendations and safety guidelines;
Recommended 12 Gauge Shells
The Winchester Ranger Model 120, like many shotguns, functions reliably with a wide variety of 12-gauge shells. However, consulting the owner’s manual is paramount for specific recommendations regarding shell weight and type. Generally, loads ranging from 2 ¾ inch to 3 ½ inch are compatible, encompassing options for birdshot, buckshot, and slugs.
For recreational shooting, lighter loads (7 ½, 8, or 9 shot) are suitable. When pursuing larger game, heavier loads like 00 buckshot or rifled slugs are more appropriate. Always prioritize ammunition that meets SAAMI specifications to ensure safe operation, similar to adhering to platform standards like Moodle or BOXnet for reliable performance.
Avoid using shells with excessively high pressures, as this can damage the firearm. Referencing the manual’s load data section will provide precise guidance for optimal performance and longevity.
Choke Tube Information (If Applicable)
The Winchester Ranger Model 120 typically features a fixed choke, meaning it is not designed with interchangeable choke tubes. This is a crucial detail often outlined in the owner’s manual. The standard choke constriction is generally improved cylinder, suitable for a variety of shooting applications, much like a standardized learning platform such as Moodle.
Understanding the fixed choke is vital for pattern consistency. It impacts the spread of the shot, influencing effective range. While aftermarket modifications may be possible, altering the choke can void warranties and potentially compromise safety.
Always consult a qualified gunsmith before attempting any modifications. The manual will detail the factory specifications and limitations regarding choke constriction, ensuring responsible firearm ownership.
Recoil Management Techniques
The Winchester Ranger Model 120, like all 12-gauge shotguns, produces noticeable recoil. Proper technique, detailed in the manual, minimizes discomfort and maintains accuracy. A firm grip, coupled with a solid shooting stance, is paramount – similar to a stable online learning environment like Moodle.
Employing a proper shoulder weld, ensuring firm contact with the stock, absorbs energy. Utilizing recoil pads (factory or aftermarket) further reduces felt recoil. Appropriate ammunition selection also plays a role; lighter loads generate less recoil.
Practice and consistent form are key to mastering recoil management. The manual emphasizes safe handling and responsible shooting practices, promoting control and accuracy.
Accessories and Modifications
The manual details compatible accessories, mirroring online platform extensibility like Moodle with BigBlueButton for enhanced virtual classroom experiences.
Aftermarket Stocks and Forends
The Winchester Ranger Model 120 manual often lacks extensive details on aftermarket modifications. However, owners frequently seek to upgrade the stock and forend for improved ergonomics, aesthetics, or recoil reduction. Resources, similar to online learning platforms like Moodle, demonstrate a community-driven approach to sharing information.
Various manufacturers offer replacements crafted from materials like laminated wood, synthetic polymers, or even fiberglass. Installation typically involves removing the original components and carefully fitting the new ones, ensuring proper function and safety. Like BOXnet centralizing documentation, dedicated forums compile fitment guides and user experiences. Always verify compatibility before purchasing, and consult a qualified gunsmith if unsure about the process.
Choke Tube Options and Installation
The Winchester Ranger Model 120’s manual may provide limited information regarding choke tube options, as variations depend on the specific barrel configuration. However, aftermarket choke tubes significantly enhance versatility for different shooting applications – from tight patterns for turkey to wider spreads for upland game.
Installation, much like utilizing a centralized platform like BOXnet for organized information, requires careful attention to detail. Typically, removing the old choke involves a specialized wrench, followed by threading in the new tube, ensuring proper torque. Resources mirroring Moodle’s collaborative learning environment offer detailed guides and videos. Always consult the choke tube manufacturer’s instructions and a gunsmith if unfamiliar with the process.
Sights and Optics Compatibility
The Winchester Ranger Model 120 typically features a simple bead sight, but its receiver is drilled and tapped for scope mounts, offering optics compatibility. Similar to accessing information on platforms like Moodle, expanding sighting options enhances shooting precision and range.
Various aftermarket bases and rings are available to accommodate different scope types – from traditional hunting scopes to modern red dot sights. Installation, like organizing documents within a system like BOXnet, requires careful alignment and secure mounting. Always verify compatibility with the receiver and follow the manufacturer’s torque specifications. Professional gunsmithing is recommended for optimal results and safety.

Safety Precautions and Legal Considerations
Always practice safe handling, mirroring responsible online platform use like Moodle, and adhere to all local, state, and federal regulations regarding ownership.
Safe Handling Procedures
Prior to handling the Winchester Ranger Model 120, always ensure the firearm is unloaded, pointing in a safe direction. Treat every firearm as if it is loaded. Keep your finger off the trigger until ready to shoot.
Be certain of your target and what is beyond it. Utilize proper eye and ear protection during shooting activities. Store ammunition separately from the firearm, ideally in a locked container.
Familiarize yourself with the shotgun’s safety mechanism and engage it whenever the firearm is not in use. Consider online learning platforms, similar to Moodle, for safety courses. Responsible gun ownership, like secure digital document access via BOXnet, is paramount.
Legal Regulations Regarding Ownership
Ownership of the Winchester Ranger Model 120 is subject to federal, state, and local laws. These regulations vary significantly by location, often mirroring the structured access control found in platforms like BOXnet.
Federal law requires individuals to be 18 years of age to purchase a shotgun. Many states have additional restrictions, including waiting periods and background checks. Some jurisdictions may prohibit certain features or magazine capacities.

It is the owner’s responsibility to understand and comply with all applicable laws. Resources, similar to those found on Moodle, can provide information on local regulations. Failure to comply can result in severe penalties.
Proper Storage to Prevent Accidents
Safe storage of the Winchester Ranger Model 120 is paramount, mirroring the secure access principles of platforms like BOXnet and Moodle. Always store unloaded, with the action open. Utilize a gun safe or lockable cabinet to prevent unauthorized access.
Ammunition should be stored separately from the firearm, in a locked container. This prevents accidental loading or misuse. Consider trigger locks or cable locks as additional safety measures.
Educate all household members about firearm safety and the importance of secure storage. Regular inspections of storage methods are crucial, ensuring continued effectiveness and preventing accidental discharge.

Resources and Further Information
Explore online forums and communities, similar to Moodle’s collaborative learning environment, for manuals and support regarding the Winchester Ranger Model 120.
Where to Find Original Manuals (If Available)
Locating original Winchester Ranger Model 120 manuals can prove challenging, as they weren’t consistently digitized. Online gun forums, much like the collaborative spaces found on platforms like Moodle, often host scanned copies shared by collectors.
Auction sites, such as GunBroker, sometimes list original manuals for sale, though prices vary significantly based on condition and rarity. Additionally, contacting Winchester’s customer service might yield information about obtaining reproductions or accessing archived documentation. Resources similar to BOXnet, centralizing digital documents, don’t currently exist specifically for vintage firearms manuals, making diligent searching crucial.
Online Forums and Communities
Numerous online forums dedicated to firearms, particularly shotguns, serve as invaluable resources for Winchester Ranger Model 120 owners. These communities, mirroring the interactive learning environment of platforms like Moodle, facilitate knowledge sharing and problem-solving.
Dedicated threads often contain discussions about manuals, parts identification, and troubleshooting. Websites like Gunboards and dedicated shotgun forums are excellent starting points. Similar to BOXnet’s centralized communication, these forums allow direct interaction with experienced owners and gunsmiths, offering practical advice and assistance unavailable elsewhere.
Gunsmithing Services and Repair
For repairs or modifications beyond the scope of the owner’s manual, professional gunsmithing services are essential. Finding a qualified gunsmith, much like accessing specialized support on platforms like Moodle, ensures safe and correct repairs.
Local gun shops often have resident gunsmiths or can provide referrals. Online directories can also help locate certified professionals. When seeking repair, clearly communicate the issue, referencing the manual if possible. Similar to BOXnet’s centralized documentation, providing detailed information streamlines the process and ensures accurate service for your Winchester Ranger Model 120.