paccar mx 13 service manual pdf

Paccar MX-13 Service Manual PDF: A Comprehensive Guide
Unlocking peak performance and longevity for your Paccar MX-13 engine requires a dedicated resource; this comprehensive guide details accessing and utilizing the official PDF manual․
This manual streamlines workflows, boosts productivity, and provides a detailed user guide for maximizing product benefits, alongside crucial legal terms for informed operation․
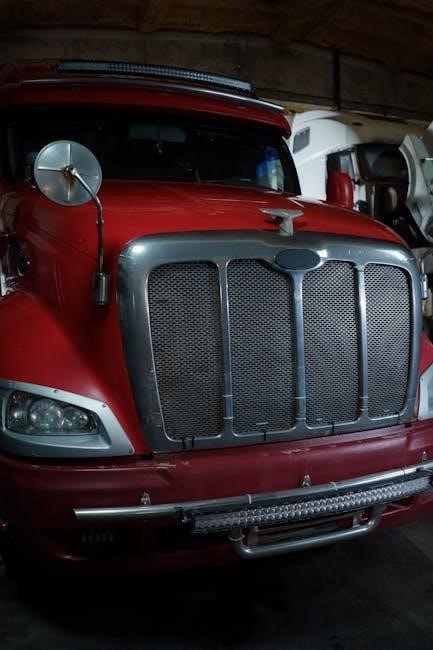
The Paccar MX-13 engine represents a significant advancement in diesel technology, powering a wide range of heavy-duty vehicles and equipment․ Known for its robust design, fuel efficiency, and reliability, the MX-13 is a cornerstone of Paccar’s commitment to delivering high-performance solutions․
This engine is meticulously engineered to meet stringent emissions standards while providing exceptional power and torque․ Understanding its intricate systems – from fuel injection to turbocharging – is paramount for effective maintenance and repair․ A dedicated service manual, specifically the Paccar MX-13 Service Manual PDF, becomes an indispensable tool for anyone working with this engine․
The manual provides detailed insights into the engine’s architecture, enabling technicians and operators to diagnose issues accurately and perform necessary repairs with confidence․ It’s a gateway to unlocking the full potential of the MX-13, ensuring optimal performance and minimizing downtime․
Why a Service Manual is Crucial for MX-13 Maintenance
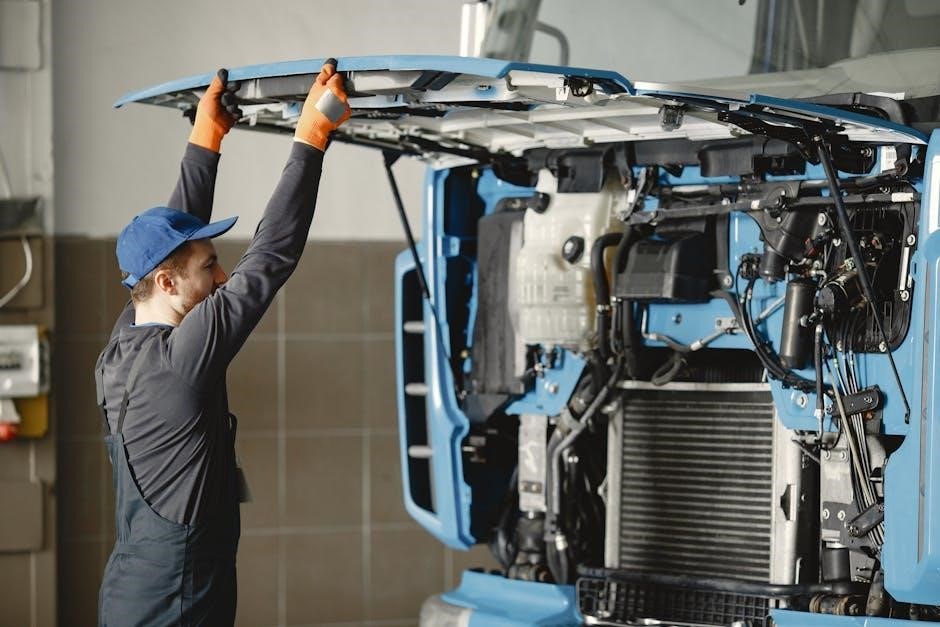
A Paccar MX-13 Service Manual PDF isn’t merely a helpful resource; it’s absolutely crucial for maintaining the engine’s performance, reliability, and longevity․ The engine’s complexity demands precise procedures, and attempting repairs without detailed instructions can lead to costly mistakes and further damage․
The manual provides step-by-step guidance for everything from routine maintenance – like oil changes and filter replacements – to complex diagnostics and repairs․ It ensures that all work is performed to Paccar’s exacting standards, preserving the engine’s warranty and maximizing its lifespan․
Furthermore, access to the correct manual streamlines workflows, reduces downtime, and empowers technicians to efficiently address issues․ It’s an investment in preventative maintenance, ultimately saving time and money while keeping vehicles operational․
Locating and Downloading the Paccar MX-13 Service Manual PDF
Accessing the official Paccar MX-13 Service Manual PDF involves exploring Paccar’s resources or authorized third-party providers, ensuring a secure and authentic download․
Official Paccar Resources for Manual Access
Paccar’s official channels represent the most reliable source for obtaining the genuine MX-13 service manual PDF․ Begin your search on the Paccar Parts website, navigating to the documentation or resources section specifically dedicated to engine service information․
Often, access requires registration and may involve a subscription fee, particularly for detailed technical manuals like the MX-13 PDF․ Dealers are also invaluable resources; contacting your local Paccar dealership’s parts department can provide direct access to the manual, potentially in digital format or guidance on obtaining it․
Furthermore, Paccar’s online support portal frequently hosts downloadable resources, including service manuals, troubleshooting guides, and parts catalogs․ Always prioritize official sources to guarantee the manual’s accuracy, completeness, and adherence to the latest engine specifications, safeguarding your maintenance procedures․
Third-Party Providers of MX-13 Service Manuals
While official Paccar resources are preferred, several third-party providers offer the MX-13 service manual PDF․ Online marketplaces and specialized diesel engine repair websites frequently list these manuals for sale or download․ However, exercising caution is paramount when utilizing these sources․
Verify the provider’s reputation and read customer reviews before making a purchase․ Ensure the manual is a legitimate copy and not a scanned, low-quality reproduction․ Be wary of unusually low prices, as they may indicate an unauthorized or incomplete manual․
Some providers offer subscription-based access to a library of service manuals, which can be a cost-effective option if you require access to multiple resources․ Always prioritize providers with clear return policies and guarantees of manual authenticity․
Ensuring PDF Authenticity and Security
Protecting your systems from malware and ensuring accurate information is crucial when downloading the Paccar MX-13 service manual PDF․ Always scan downloaded files with reputable antivirus software before opening them․ Verify the file source; official Paccar links are the safest option, followed by well-known, trusted providers․
Look for digital signatures or watermarks indicating the manual’s origin and authenticity․ Be cautious of PDFs requesting personal information or prompting you to enable macros, as these could be security risks․
Cross-reference critical data with other reliable sources to confirm accuracy․ A legitimate manual will contain consistent information and adhere to Paccar’s formatting standards․ Prioritize security protocols to safeguard your equipment and data․

Understanding the Manual’s Structure & Contents
The Paccar MX-13 service manual PDF is logically organized, featuring detailed engine specifications, troubleshooting guides, and comprehensive maintenance schedules for optimal performance․
Engine Specifications and Technical Data
The Paccar MX-13 service manual PDF meticulously details crucial engine specifications, forming the bedrock for accurate diagnostics and effective repairs․ This section provides comprehensive technical data, including displacement, bore and stroke dimensions, compression ratios, and detailed information regarding the engine’s various configurations․
You’ll find precise torque curves, horsepower ratings at different RPMs, and fuel consumption figures under varying load conditions․ Furthermore, the manual outlines specific data pertaining to the engine’s emissions control systems, including details on the Diesel Particulate Filter (DPF) and Selective Catalytic Reduction (SCR) systems․
Weight specifications – both dry and with accessories – are clearly presented, alongside fluid capacities for oil, coolant, and other essential systems․ This data is vital for ensuring correct fluid levels and preventing potential damage․ The manual also includes detailed diagrams illustrating component locations and dimensions, aiding in identification and proper installation during service procedures․
Troubleshooting Guides & Diagnostic Codes
The Paccar MX-13 service manual PDF features extensive troubleshooting guides designed to pinpoint and resolve engine issues efficiently․ These guides systematically address common problems, offering step-by-step diagnostic procedures to identify the root cause of malfunctions․
A critical component of this section is the comprehensive list of Diagnostic Trouble Codes (DTCs)․ Each DTC is thoroughly explained, detailing the potential causes, associated symptoms, and recommended repair actions․ The manual clarifies how to interpret these codes using diagnostic software, enabling technicians to quickly isolate faults․
Flowchart-based diagnostic procedures guide users through a logical sequence of tests, minimizing guesswork and reducing diagnostic time․ The manual also provides guidance on interpreting sensor data and utilizing diagnostic tools for accurate assessments․ This section empowers users to effectively address a wide range of engine performance issues․
Maintenance Schedules & Procedures
The Paccar MX-13 service manual PDF delivers meticulously detailed maintenance schedules, crucial for preserving engine reliability and extending its operational lifespan․ These schedules outline recommended service intervals based on engine operating hours or mileage, ensuring proactive upkeep․
Detailed procedures cover all essential maintenance tasks, including oil and filter changes, coolant flushes, air filter replacements, and fuel system servicing․ Each procedure is illustrated with clear diagrams and step-by-step instructions, making them accessible to technicians of varying experience levels․
The manual specifies torque specifications, fluid capacities, and recommended parts, guaranteeing accurate and consistent maintenance․ It also includes guidance on performing inspections of critical components, identifying potential issues before they escalate into major repairs, and maintaining optimal performance․

Key Maintenance Procedures Covered in the Manual
The Paccar MX-13 service manual PDF expertly details vital procedures like oil changes, cooling system upkeep, fuel system diagnostics, and air intake system servicing․
Oil Change Procedures for the MX-13
The Paccar MX-13 service manual PDF provides a step-by-step guide to performing oil changes, crucial for maintaining engine health and longevity․ It details the specific oil grade and capacity required for optimal performance, preventing premature wear and tear․
The manual illustrates proper drain plug location and torque specifications, ensuring a leak-free seal․ It also covers oil filter replacement procedures, including filter type and tightening instructions․ Crucially, the manual emphasizes the importance of proper disposal of used oil, adhering to environmental regulations․
Furthermore, it outlines inspection points during the oil change, such as checking for coolant leaks or unusual wear on components․ Following these procedures, as outlined in the PDF, guarantees a correctly executed oil change, contributing to the MX-13’s reliable operation and extended lifespan․ Detailed diagrams and torque values are included for clarity․
Cooling System Maintenance & Repair
The Paccar MX-13 service manual PDF offers comprehensive guidance on maintaining and repairing the engine’s cooling system, vital for preventing overheating and ensuring optimal performance․ It details procedures for inspecting coolant levels, hoses, and the radiator for leaks or damage․
The manual provides specific instructions for flushing the cooling system, including recommended coolant types and mixing ratios․ It also covers thermostat replacement, water pump inspection, and fan clutch testing, outlining torque specifications and proper installation techniques․
Importantly, the PDF highlights diagnostic procedures for identifying cooling system faults, such as restricted coolant flow or a faulty radiator cap․ Following these guidelines, as detailed in the manual, ensures effective cooling system maintenance, preventing costly engine repairs and maximizing the MX-13’s operational reliability․ Diagrams and troubleshooting charts are included․
Fuel System Diagnostics and Service
The Paccar MX-13 service manual PDF provides detailed procedures for diagnosing and servicing the engine’s fuel system, crucial for maintaining optimal power and fuel efficiency․ It covers inspection of fuel lines, filters, and the fuel tank for contamination or damage, emphasizing safety precautions when handling fuel․
The manual outlines step-by-step instructions for fuel filter replacement, fuel pressure testing, and injector leak-off testing․ It details how to interpret diagnostic trouble codes (DTCs) related to the fuel system, guiding technicians through troubleshooting procedures․
Furthermore, the PDF includes specifications for fuel pump operation and injector performance, alongside procedures for injector cleaning and replacement․ Adhering to these guidelines, as presented in the manual, ensures a properly functioning fuel system, contributing to reduced emissions and extended engine life․
Air Intake System Inspection and Cleaning
The Paccar MX-13 service manual PDF dedicates significant attention to the air intake system, recognizing its vital role in engine performance and longevity․ It details thorough inspection procedures for air filters, intake ducts, and turbocharger connections, highlighting potential leak points and damage indicators․
The manual provides step-by-step instructions for air filter replacement, specifying correct filter types and installation techniques․ It also outlines procedures for cleaning the intake manifold and turbocharger inlet, removing carbon buildup that can restrict airflow․
Crucially, the PDF includes guidance on checking for boost leaks and verifying turbocharger operation․ Following these procedures, as detailed within the manual, ensures optimal airflow, maximizing engine power and fuel efficiency while minimizing harmful emissions and promoting overall engine health․

Advanced Diagnostics & Repair Techniques
The Paccar MX-13 service manual PDF unlocks expert-level repair capabilities, detailing diagnostic software utilization, injector analysis, and turbocharger overhaul procedures for optimal results․
Using Diagnostic Software with the MX-13
The Paccar MX-13 service manual PDF provides detailed instructions for interfacing with proprietary diagnostic software, essential for pinpointing complex engine issues․ This software allows technicians to access a wealth of real-time data, including sensor readings, fault codes, and operational parameters․
The manual guides users through the connection process, software navigation, and interpretation of diagnostic results․ It emphasizes the importance of utilizing the correct software version and interface adapters for accurate readings․ Furthermore, it details how to perform guided diagnostics, which lead technicians step-by-step through troubleshooting procedures based on specific fault codes․
Understanding data parameters, freeze frame data, and active/inactive fault code analysis is crucial․ The manual also covers advanced features like component activation tests, enabling technicians to verify the functionality of individual engine components․ Proper software utilization, as outlined in the PDF, significantly reduces diagnostic time and ensures accurate repairs․
Injector Testing and Replacement
The Paccar MX-13 service manual PDF dedicates significant detail to injector diagnostics and service, crucial for maintaining optimal fuel delivery and engine performance․ It outlines procedures for both on-engine and off-engine injector testing, utilizing specialized tools to assess spray patterns, leakage, and overall functionality․
The manual provides clear instructions for injector removal and installation, emphasizing the importance of cleanliness and proper torque specifications to prevent fuel leaks and damage․ Detailed diagrams illustrate injector component locations and assembly procedures․ It also covers back-leak testing, a vital step in identifying injectors with internal wear or damage․
Replacement procedures are thoroughly explained, including coding new injectors to the engine control unit (ECU) to ensure correct operation․ The manual stresses the necessity of using genuine Paccar injectors and adhering to all safety precautions when working with fuel systems․
Turbocharger Inspection and Overhaul
The Paccar MX-13 service manual PDF provides exhaustive guidance on turbocharger maintenance, inspection, and complete overhaul procedures․ It details step-by-step instructions for removing the turbocharger assembly, emphasizing proper disconnection of oil and coolant lines to prevent damage or leaks․
The manual outlines a comprehensive inspection process, covering the turbine and compressor wheels for damage, bearing wear, and oil contamination․ It includes detailed specifications for shaft play and bearing clearances, alongside procedures for checking the wastegate and boost control systems․
Overhaul procedures are meticulously described, including disassembly, cleaning, inspection of all components, and reassembly with new seals and gaskets․ The manual stresses the importance of balancing the rotating assembly and verifying proper oil lubrication upon reinstallation․
Safety Precautions When Using the Manual
Prioritize safety during all repair procedures; the Paccar MX-13 manual emphasizes guidelines for engine work, handling hazardous materials, and electrical system precautions․
General Safety Guidelines for Engine Repair
Before commencing any maintenance or repair work on the Paccar MX-13 engine, strict adherence to safety protocols is paramount․ Always disconnect the battery’s negative terminal to prevent accidental electrical shorts and potential ignition of flammable fluids․
Ensure the work area is well-ventilated, especially when dealing with fuels, coolants, or cleaning solvents․ Wear appropriate personal protective equipment (PPE), including safety glasses, gloves resistant to chemicals, and sturdy work boots․
Never work under a lifted vehicle without properly supporting it with jack stands rated for the engine’s weight․ Hot engine components can cause severe burns; allow sufficient cooling time before touching any parts․
Be mindful of moving parts, and avoid loose clothing or jewelry that could become entangled․ Consult the Paccar MX-13 service manual for specific safety warnings related to each procedure, and always follow the recommended torque specifications to prevent component failure․
Handling Hazardous Materials
The Paccar MX-13 engine’s maintenance necessitates handling various hazardous materials, demanding strict safety measures․ Used engine oil, coolants, and fuels are environmentally damaging and pose health risks; always contain and dispose of them responsibly, following local regulations․
Wear chemical-resistant gloves and eye protection when handling these substances to prevent skin contact and potential irritation․ Avoid inhaling fumes from fuels or solvents – ensure adequate ventilation or use a respirator․
Spills should be cleaned up immediately using absorbent materials, and the contaminated waste disposed of properly․ Refer to the Paccar MX-13 service manual’s Material Safety Data Sheets (MSDS) for detailed information on each substance’s hazards and safe handling procedures․
Always store hazardous materials in clearly labeled, sealed containers, away from heat sources and ignition points, prioritizing environmental protection and personal well-being․
Electrical System Safety
The Paccar MX-13 engine incorporates a complex electrical system, demanding meticulous safety precautions during any diagnostic or repair work․ Before commencing any electrical work, always disconnect the battery’s negative terminal to prevent accidental shorts and potential electrical shock․
Never work on live electrical circuits; utilize appropriate insulated tools designed for automotive electrical systems․ Inspect wiring harnesses for damage – frayed wires or corroded connectors can create hazards․
The service manual provides detailed wiring diagrams and component locations; consult these before disconnecting or reconnecting any electrical components․ Be mindful of sensitive electronic control units (ECUs) – static discharge can damage them․
Proper grounding is crucial; ensure all connections are secure and corrosion-free․ Always verify the system’s functionality after repairs, referencing the manual for correct voltage and resistance readings․

Common Issues Addressed in the Manual
The Paccar MX-13 service manual expertly guides users through resolving frequent problems like overheating, power loss, and emission system malfunctions, ensuring optimal engine function․
Addressing MX-13 Engine Overheating
The Paccar MX-13 service manual dedicates significant attention to diagnosing and rectifying engine overheating issues․ It begins with a detailed explanation of the cooling system’s components – radiator, water pump, thermostat, and coolant hoses – and their proper function․
The manual provides step-by-step procedures for inspecting coolant levels, checking for leaks, and pressure testing the system․ It also outlines how to identify a faulty thermostat or water pump, including specific diagnostic codes that may appear․
Furthermore, the manual details the correct flushing and refilling procedures for the cooling system, emphasizing the importance of using the correct coolant type․ It also covers troubleshooting scenarios involving the radiator fan and its control module, offering guidance on electrical testing and component replacement․
Crucially, the manual stresses preventative maintenance, such as regular coolant analysis, to avoid overheating incidents and extend the engine’s lifespan․
Troubleshooting Low Power Complaints
The Paccar MX-13 service manual offers a systematic approach to resolving low power complaints․ It begins by guiding technicians through initial checks, including verifying engine load, fuel quality, and air intake restrictions․ Diagnostic flowcharts help pinpoint the source of the problem, whether it’s related to the fuel system, air system, or engine itself․
Detailed procedures are provided for testing fuel injectors, fuel pumps, and fuel filters, alongside instructions for checking turbocharger operation and boost pressure․ The manual also covers diagnosing issues with the engine control unit (ECU) and its sensors, utilizing diagnostic trouble codes (DTCs) for efficient troubleshooting․
Specific attention is given to exhaust restrictions, including checking for clogged diesel particulate filters (DPFs) and catalytic converters․ The manual outlines methods for assessing engine compression and valve timing, offering guidance on more extensive repairs if necessary․
Ultimately, the manual aims to restore optimal engine performance through accurate diagnosis and effective repair procedures․
Resolving Emission System Problems
The Paccar MX-13 service manual provides comprehensive guidance for diagnosing and resolving emission system issues․ It details procedures for troubleshooting common problems related to the Diesel Particulate Filter (DPF), Selective Catalytic Reduction (SCR) system, and Exhaust Gas Recirculation (EGR) valve․
Technicians can utilize diagnostic trouble codes (DTCs) and detailed flowcharts to pinpoint the root cause of emission-related failures․ The manual offers step-by-step instructions for inspecting and cleaning DPFs, checking SCR injector functionality, and verifying EGR valve operation․
Specific attention is given to the DEF (Diesel Exhaust Fluid) system, including troubleshooting issues with DEF quality, injector nozzles, and level sensors․ Procedures for verifying NOx sensor accuracy and diagnosing issues with the ECU’s emission control strategies are also included․

The manual ensures compliance with emission regulations by providing accurate repair procedures and calibration data, restoring optimal emission system performance․

Manual Updates and Revisions
Staying current with the Paccar MX-13 service manual is vital; regularly check for the latest version and understand revision history for accurate repair data․
Checking for the Latest Manual Version
Ensuring you possess the most recent Paccar MX-13 service manual PDF is paramount for accurate diagnostics and repairs; Paccar frequently releases updates addressing new components, revised procedures, and clarified troubleshooting steps․ Regularly verifying your manual’s version prevents reliance on outdated information that could lead to incorrect service and potential engine damage․
The official Paccar resources, detailed elsewhere in this guide, are the primary source for the newest revisions․ Look for a clearly marked version number and date on the manual’s cover or within the document’s properties․ Compare this information against the latest available on the Paccar website․
Furthermore, subscribing to Paccar’s service update notifications can proactively alert you to new manual releases․ Ignoring updates risks misdiagnosis, improper repairs, and compromised engine performance, ultimately impacting operational efficiency and increasing maintenance costs․ Prioritize staying informed!
Understanding Revision History and Changes
The Paccar MX-13 service manual PDF incorporates a detailed revision history, crucial for technicians to understand the evolution of repair procedures․ Each update isn’t arbitrary; it reflects field experience, engineering refinements, and component modifications․ This history typically outlines the date of the revision, a summary of changes, and the affected sections within the manual․
Pay close attention to these change logs․ They might indicate updates to diagnostic trouble codes (DTCs), torque specifications, or even entirely new repair sequences․ Ignoring these details can lead to applying outdated methods, potentially causing further damage or invalidating warranty claims․
Reviewing the revision history allows for a targeted understanding of what’s different, saving time and ensuring accurate service․ Paccar’s commitment to continuous improvement is reflected in these updates, making the manual a dynamic resource for optimal MX-13 engine maintenance․